
Nov 2018

|
back to www.audiodesignguide.com |
To
get more information contact me at:
webmaster@audiodesignguide.com |
|
|
|
|
|
HQPlayer Embedded Nov 2018 |
|
INTRODUCTION
I can guarantee that DSC1 2.5 / 2.6 is the best digital source and the maximum sonic performance can only be achieved using the software HQPlayer desktop.
This software is available for Windows, Linux and macOS and it have many algorithm for noise filters which allow many sound variations.
The embedded version of HQPlayer is designed for building Linux-based music playback devices and digital audio processors.
HQPlayer embedded is a
daemon server running on a dedicated hardware so it is immune to any
interference allowing a perfect reproduction of any track at high bitrate
also during the PCM to DSD on-the-fly convertion.
About the DAC hardware I keep experimenting new solutions based on DSC1 with
Pavel Pogodin.
CHOICE OF HARDWARE
The PCM to DSD on-the-fly convertion consumes a lot of
CPU so it is necessary to use a good computer but it depend by the configuration
of the HQPlayerd.
The DSD used sample rates that are multiple of 44100 Hz:
The hardware suggested by
Sygnalyst is a Pentium N4200
2.5 GHz with
8Gb of memory and it is good for DSD256 using -2s filters but if your
target is the best quality so DSD512 you need a i5-7600T 3.70 GHz.
The differences
from
DSD256 and DSD512 are not big and probably I will continue to use the
DSD256 in the future.
One my friend use Daphile
on an
old Apple Mac mini with 1.83 GHz Core 2 Duo and he can play only at DSD64 with an evident degradation of sound performances
but always a good result if compared with a good DAC like Sabre ES9038.
In any case, the performance of the computer that you plan to use must
be evaluated very well because there are considerable differences between
one processor and another, even when all Intel I5 CPUs are compared.
Here the task manager on my
laptop HP 840 G2 with Intel i5-5300M CPU 2.30GHz playing with HQPlayerd a 192KHz 24bit
track resampled to DSD with modulator ASDM7 and output at 12MHz (DSD256).
top - 23:38:58 up 5:18, 5 users, load average: 1.83,
1.63, 1.58
Tasks: 134
total, 1 running, 133 sleeping, 0 stopped, 0 zombie
%Cpu(s): 35.4 us, 0.1 sy, 0.0 ni, 64.5 id, 0.0 wa,
0.0 hi, 0.0 si, 0.0 st
KiB Mem : 16308776 total, 197124 free, 592496 used,
15519156 buff/cache
KiB Swap: 16648188 total, 16648188 free, 0 used. 15367608 avail Mem
PID USER PR NI VIRT RES SHR
S %CPU %MEM TIME+ COMMAND
4975 root 10 -10 1195668 266596 16796 S 141.2 1.6
16:48.60 hqplayerd
t
op - 23:36:34 up 5:15, 5 users, load average: 1.91, 1.53, 1.54The last release of HQPlayer embedded need a cpu processor with support for SSE4.2 instructions so Nehalem architecture as I3, I5 and I7 but it cannot run on old Core 2 Duo with
Penryn architecture .About the disks to storage music I use USB disks
WD Book or
WD Elements,
at this time the best ratio between capacity and price is the 4Tb.
The main
filesystem for Linux systems is the ext4 but I use NTFS filesystem because
Windows is always been my main operating system on my laytop also if my job is
on Solaris / Linux systems .
The NTFS in read only is supported by Linux
without any extra packages but it is possible add the read-write function (not
necessary in my case).
I recently had a bad experience with
Seagate Expansion harddisks with blocks
during playback also if on paper the read speed should be the same of
Western Digital.
OPERATING SYSTEM INSTALLATION
Sygnalyst
give an image to
download complete of all packages necessary to run HQPlayer emebdded but
there are some limitations, for example there's no packaging system and no NTFS
filesystem support so I have prefered to use a standard but minimal operating
system.
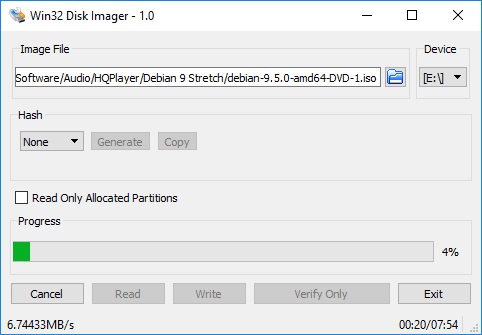
The first operation to do is the installation of the operating system so
download the debian-9.5.0-amd64-DVD-1.iso from any of these mirror
https://www.debian.org/CD/http-ftp/
or from my mirror.
Use the windows
software
Win32DiskImage or
Rufus to create
the installation media on USB pen drive.
Now verify the computer bias to be sure that
Secure Boot is disabled and UEFI
enabled.
To enter in the bios setup see the messages after power on or read
the specific manual of your computer.
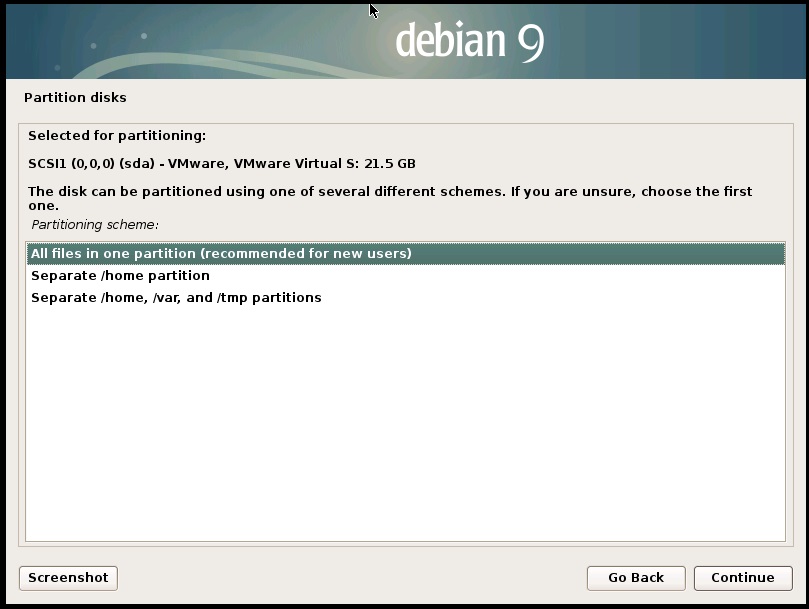
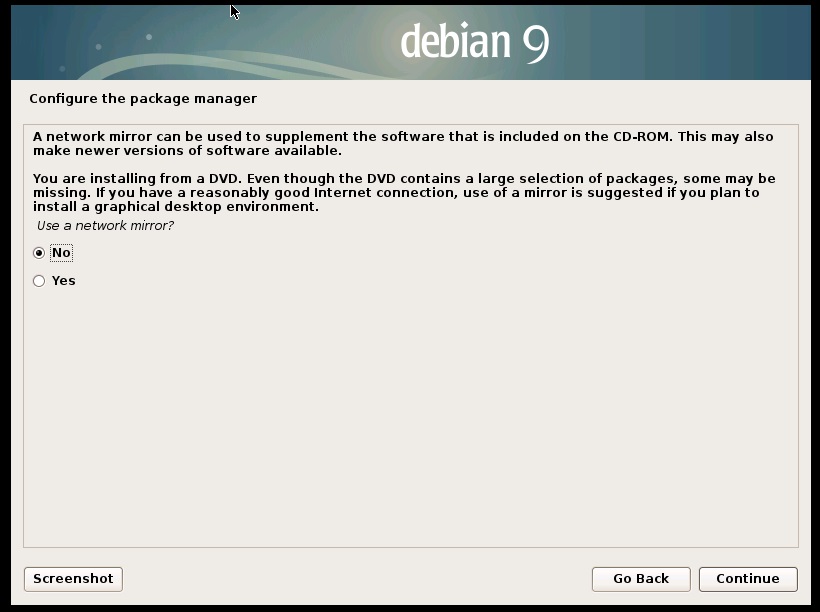
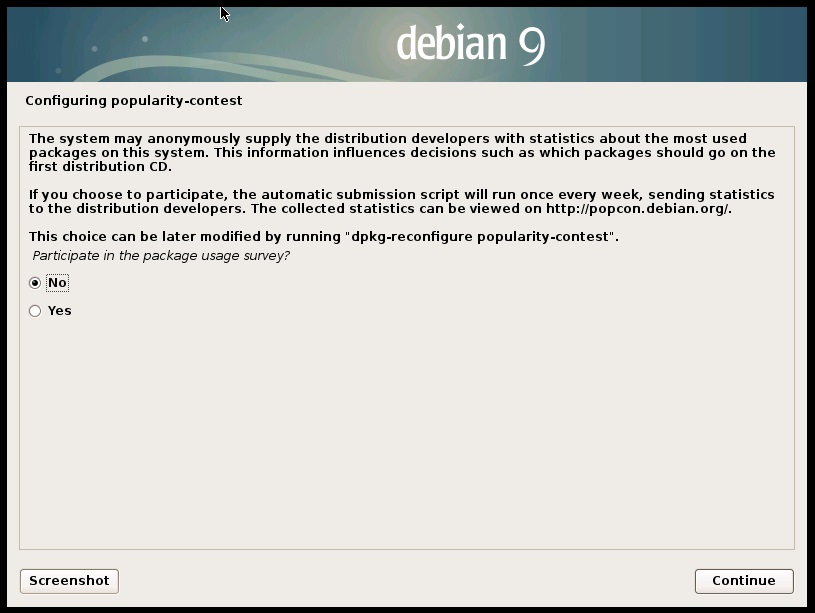
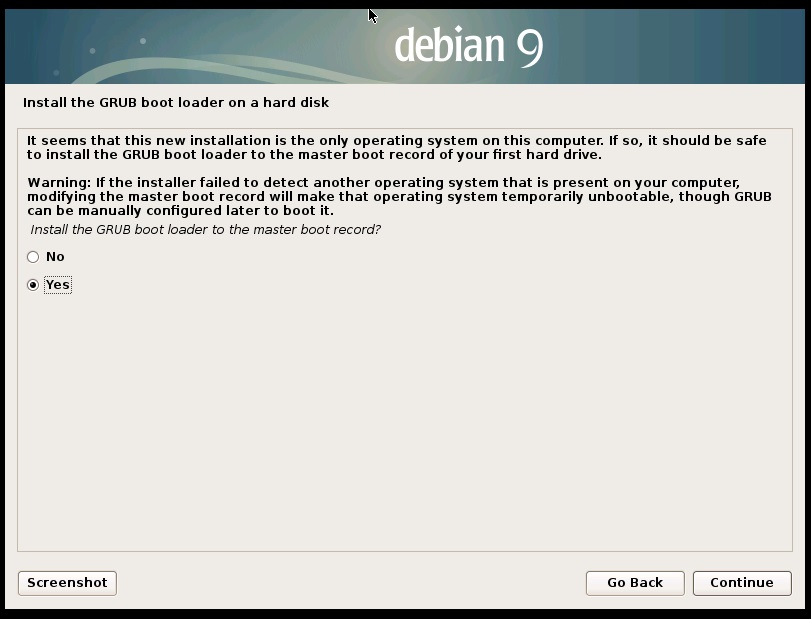
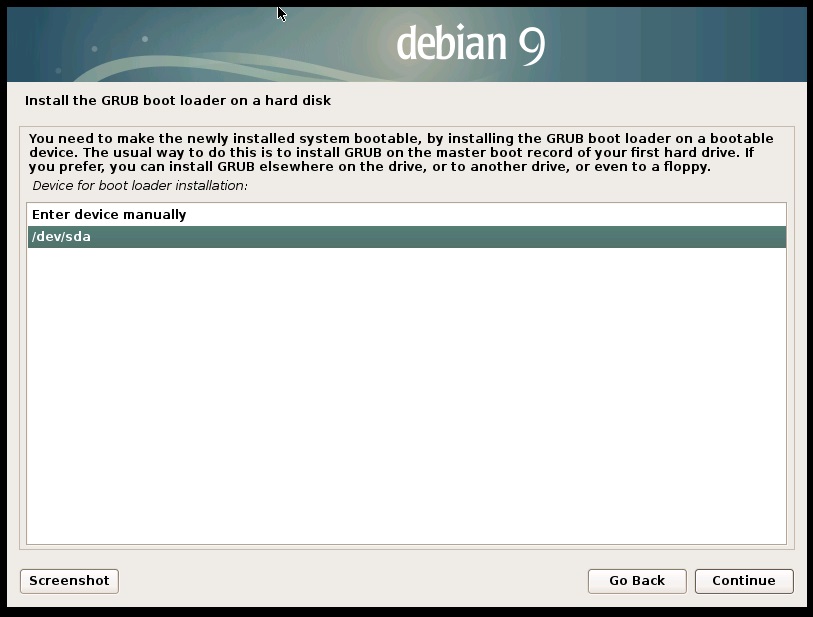
Select in boot menu the USB pen drive
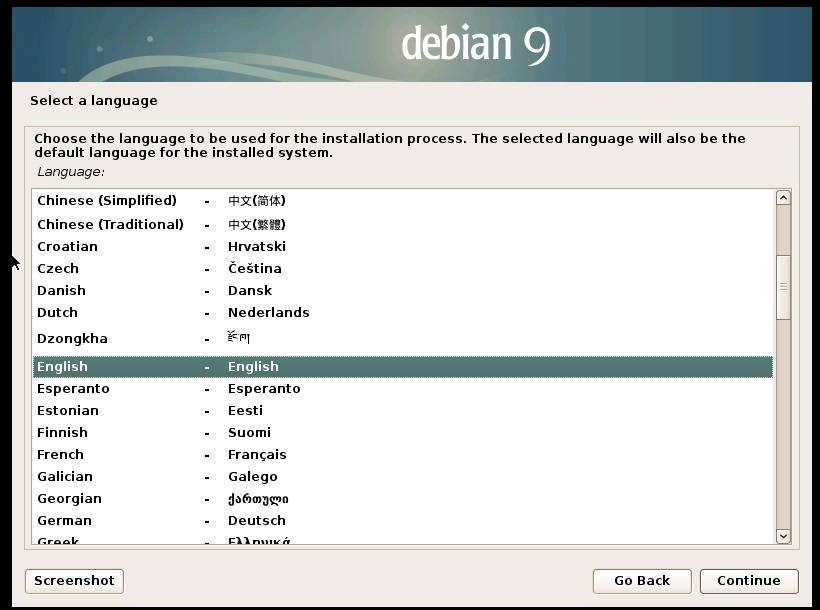
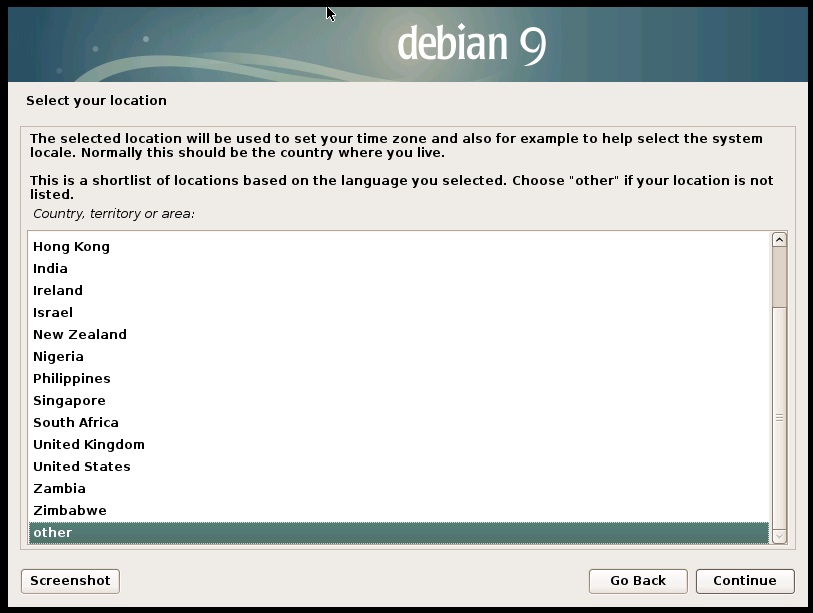
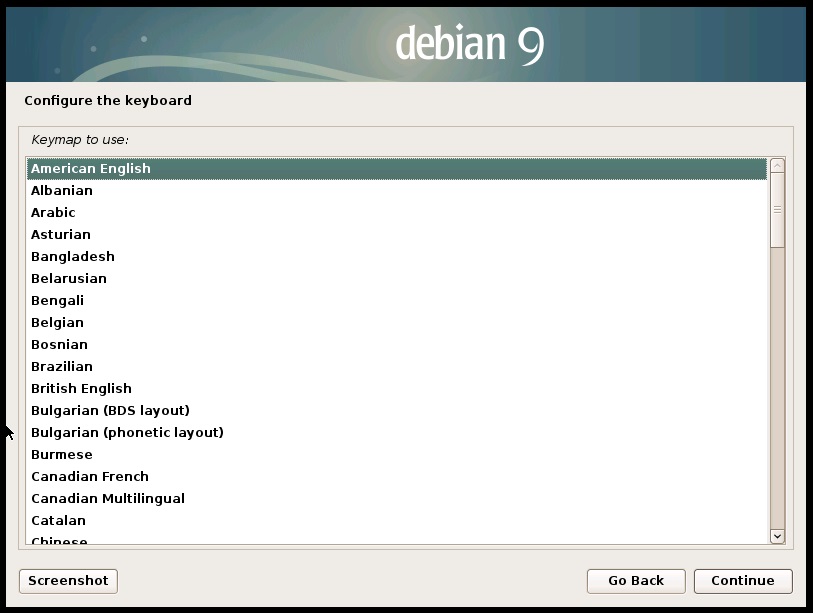
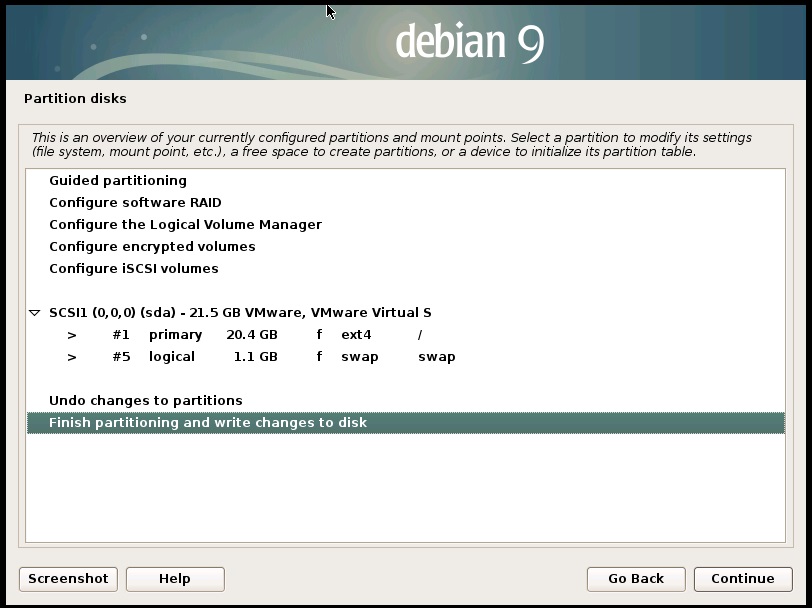
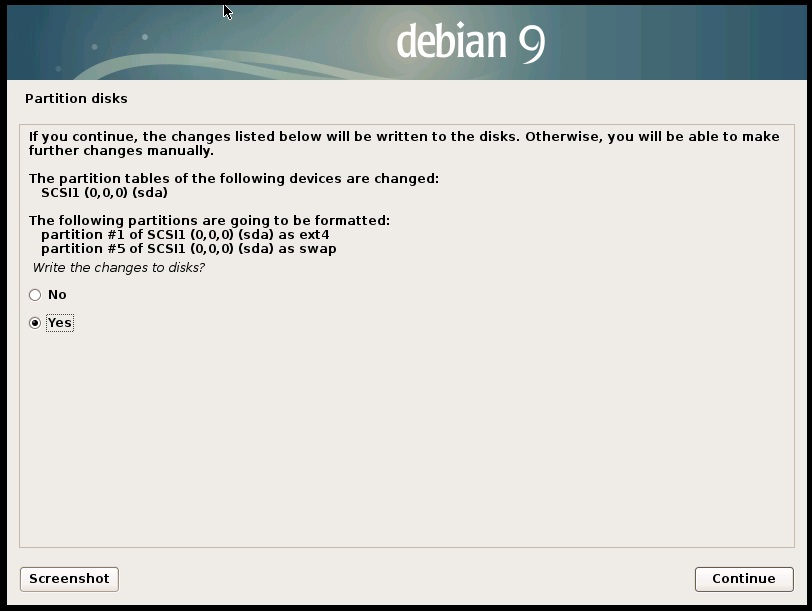
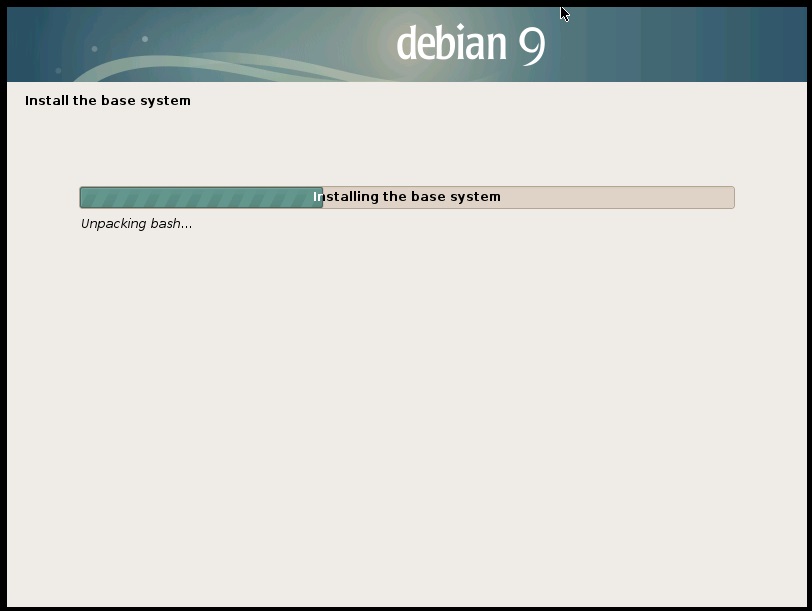
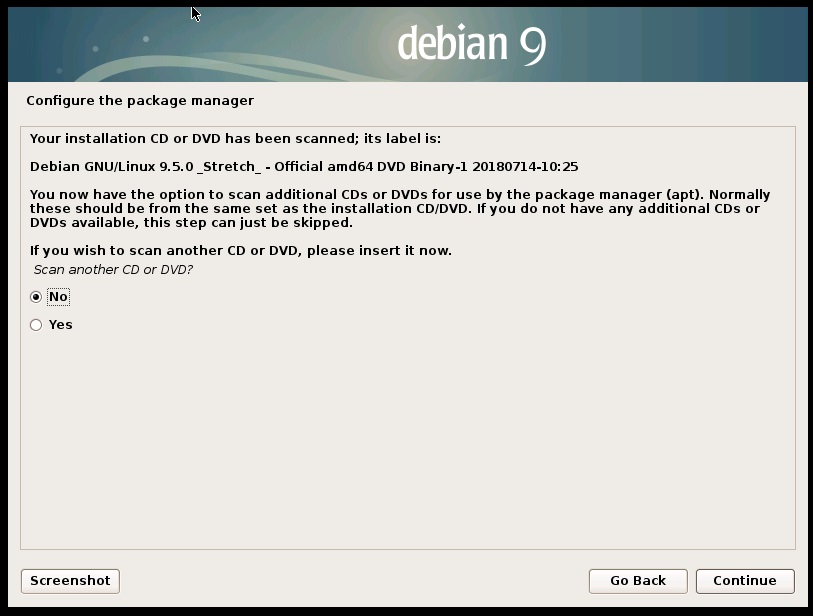
and follows these images.
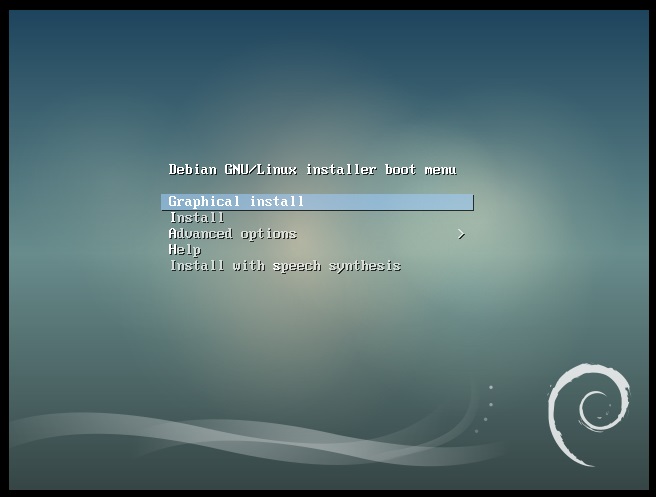
Select Graphical install
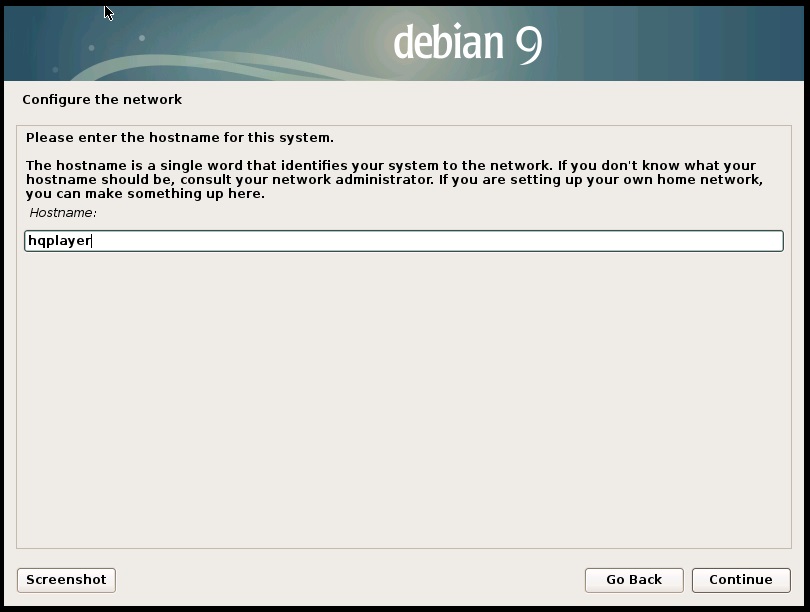
The my choice for
this computer is hqplayer but you can use any name.


The my choice for my login user is ciuffoly but you can use any name.

Deselect any
other component.
When fiinish push the Reboot button to restart the system and after some
seconds you should see the login prompt.
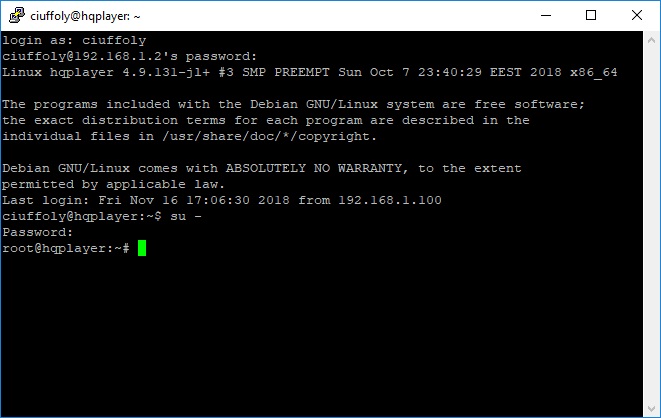
You will enter with the normal user
defined in the installation but after is necessary pass to the superuser with
"su - ".
If you are not lucky the system does not boot but you can try to enter in the
bios and select the location of the BOOTX64.EFI file under boot.
To fix this
problem after login use these following comands:
grub-install
grub-update
and if the problem is not solved:
cp /boot/efi/EFI/grub/grubx64.efi /boot/efi/EFI/boot/bootx64.efi
If you have solved all boot problem go for the following steps to configure the system.
OPERATING SYSTEM CONFIGURATION
Here follows a list of common commands to manage and configure the operationg
system.
First of all connect your computer to your network with an ethernet cable and
detect the IP address.
root@debian:~# ip addr show
1: lo: <LOOPBACK,UP,LOWER_UP> mtu 65536 qdisc noqueue
state UNKNOWN group default qlen 1
link/loopback 00:00:00:00:00:00 brd
00:00:00:00:00:00
inet 127.0.0.1/8 scope host lo
valid_lft forever preferred_lft forever
inet6 ::1/128 scope host
valid_lft forever preferred_lft forever
2: enp0s25: <BROADCAST,MULTICAST,UP,LOWER_UP> mtu
1500 qdisc pfifo_fast state UP group default qlen 1000
link/ether dc:4a:3e:02:ea:83 brd
ff:ff:ff:ff:ff:ff
inet 192.168.1.78/24 brd 192.168.1.255 scope global enp0s25
valid_lft forever preferred_lft forever
inet6 fe80::de4a:3eff:fe02:ea83/64 scope link
valid_lft forever preferred_lft forever
3: wlo1: <BROADCAST,MULTICAST,UP,LOWER_UP> mtu 1500
qdisc mq state UP group default qlen 1000
link/ether 30:52:cb:9a:6f:c8 brd
ff:ff:ff:ff:ff:ff
valid_lft forever preferred_lft forever
inet6 fe80::3252:cbff:fe9a:6fc8/64 scope link
There are 3 interfaces, one loopback used for internal comunications, a
wifi interface (wlo1) without ip and an ethernet interface called enp0s25 with
ip
192.168.1.78.
This ip is assigned by DHCP so it is dynamic and you need
to change in static in order to have always the same ip for the player
control.
The 24 after the ip is the subnet mask and 24 means that your
network starts at 1 (normally the IP of router) and ends at 255.
Follows the file to modify for the static IP configuration
(the # at the begin of a line comment/disable this).
About the editor
to modify the files the best choice under unix systems is the vi (I use
this from many years) but this is not easy
but there is the more simple called nano.
Edit the file
/etc/network/interfaces.
# This file describes the network interfaces
available on your system
# and how to activate them. For more information, see
interfaces(5).
source /etc/network/interfaces.d/*
# The loopback network
interface
auto lo
iface lo inet loopback
auto enp0s25
#iface enp0s25 inet dhcp
iface enp0s25 inet static
address 192.168.1.2
netmask 255.255.255.0
gateway
192.168.1.1
dns-nameserver 8.8.8.8
dns-nameserver 8.8.4.4
Here has been set the static IP 192.168.1.2 because the my subnet is 192.168.1.x but you can have different numbers, check the DHCP address with ip addr show.
After this configuration reload networg configuration with:
/etc/init.d/networking restart
or reboot the system with:
The default configuration of your home router should be changed to set the beginning DHCP to 3 instead of 2 otherwise other devices that are turned on before can take the address 2.
The default IP addressing
values are:
DHCP Server: Enable
Modem IP Address: 192.168.1.1
Beginning DHCP Server
Address: 192.168.1.2
Ending DHCP Server Address: 192.168.1.254
Subnet mask:
255.255.255.0
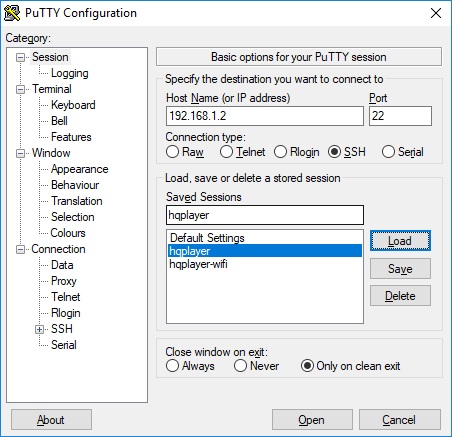
For the Windws user we need to donwload and install 2 free software to
continue the configuration in ssh and to transfert files.
The Putty is an open source software SSH client and FileZilla is
the free FTP/SFTP solution to transfert file.
 |
 |
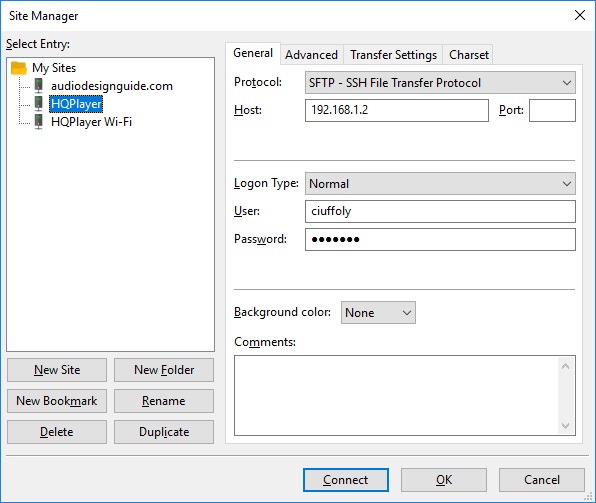
Follows an example of SFTP session with
the packages to upload on HQPlayerd computer.

You can download the following packages from the Sygnalyst website (directory bionic for Debian Linux) or directly from here.
Before install the HQPlayerd and relative packages is necessary download other
modules from Debian repository so we need to update the list of sources in the
file /etc/apt/sources.list.
#
# deb cdrom:[Debian
GNU/Linux 9.5.0 _Stretch_ - Official amd64 DVD Binary-1 20180714-10:25]
#
comment the following line
#deb cdrom:[Debian GNU/Linux 9.5.0 _Stretch_ -
Official amd64 DVD Binary-1 20180714-10:25]
# Line commented out by installer because it failed
to verify:
#deb http://security.debian.org/debian-security
stretch/updates main contrib
# Line commented out by installer because it failed
to verify:
#deb-src
http://security.debian.org/debian-security
stretch/updates main contrib
# stretch-updates,
previously known as 'volatile'
# A network mirror was not selected during install.
The following entries
# are provided as examples, but you should amend them as appropriate
# for your mirror of choice.
#
deb http://deb.debian.org/debian/
stretch-updates main contrib
deb-src http://deb.debian.org/debian/
stretch-updates main contrib
# add these lines
deb http://ftp.uk.debian.org/debian/
stable main contrib non-free
deb-src http://ftp.uk.debian.org/debian/
stable main contrib non-free
Now update repositoty list with this command:
root@HQPLayer:~# apt-get update
Hit:1 http://deb.debian.org/debian
stretch-updates InRelease
Ign:2 http://ftp.uk.debian.org/debian stable
InRelease
Hit:3 http://ftp.uk.debian.org/debian stable Release
Reading
package lists... Done
Now download and install the packages
apt-get -y install libglib2.0-0
apt-get -y install libflac8
apt-get -y install libasound2
apt-get -y install libasound2-data
apt-get -y install libgomp1

apt --fix-broken install
Not necessary but useful in checking the system
apt-get -y install net-tools
apt-get -y install dnsutils
apt-get -y install sysstat
apt-get -y install zip unzip
apt-get -y install strace

apt --fix-broken install
HQPLAYERD INSTALLATION
dpkg -i libgmpris_2.2.1-4_amd64.deb
dpkg -i libgmpris-dbg_2.2.1-4_amd64.deb
dpkg -i libgmpris-dev_2.2.1-4_amd64.deb
dpkg -i linux-headers-4.9.131-jl+_10_amd64.deb
dpkg -i linux-image-4.9.131-jl+_10_amd64.deb
apt --fix-broken
install
dpkg -i hqplayerd_4.6.1-21_amd64.deb
Start the hqplayerd with
hqplayerd
To see the disks seen by the operating system use:
On any disk you can have one or more filesystems
with different format but normally external disk have only the number 1.
Linux cannot mount
filesystem with the same UUID and this condition can be verified by connecting
various USB disks, you can verify UUID with the following comand.
root@hqplayer:~# blkid
/dev/sda1:
UUID="E2B1-B46D" TYPE="vfat" PARTUUID="3c4fa78d-d676-450c-9c0b-50a42efb3a5f"
/dev/sda2: UUID="0ad4c2d0-b171-4f7e-91aa-8b030ce4d574" TYPE="ext4"
PARTUUID="d40c8730-bb58-44be-aa49-54aab272c7e2"
/dev/sda3:
UUID="6d3bddaa-bf1f-4ebc-b93f-165add20fcad" TYPE="swap"
PARTUUID="7c2bc6df-9d4c-40b9-a2a2-b3a5642324fa"
/dev/sdb1:
LABEL="SACD4TB"
UUID="0CF4AB21F4AB0C50"
TYPE="ntfs" PARTLABEL="My Book" PARTUUID="b7dc417d-6f8d-4b7e-a2ab-f07abc4a67d4"
/dev/sdc1:
LABEL="PCM4TB"
UUID="70B808DDB808A426"
TYPE="ntfs" PARTLABEL="My Book" PARTUUID="eea88db6-37cb-4158-a3f3-3b073930c44b"
If you will have 2 or more disk with the same UUID
search on Internet the procedure to change it without lost data.
To mount
a filesystem on a disk use:
mkdir /audio/0CF4AB21F4AB0C50
mount /dev/sdb1
/audio/0CF4AB21F4AB0C50
root@hqplayer:~# df -k|grep audio
/dev/sdc1 3907015676 3295776132
611239544 85% /audio/0CF4AB21F4AB0C50
/dev/sdb1 3907015676 3291775028
615240648 85% /audio/70B808DDB808A426
to umount
umount /audio/0CF4AB21F4AB0C50
I have created a service to mount all USB disk and start HQPlayerd, you
can modify to mount other filesystem type (I have only NTFS).
The mount point include the UUID
(the Universally unique identifier of each disk) so after the switch-on this does not
change and the library does
not need a new rebuld.
Remember ciuffoly is my user but you can have a different
user name.
Create the file /home/ciuffoly/start_hqplayer.bash
#!/bin/bash
while true
do
fdisk -l|grep NTFS|while read dev d1 s1 s2 s3
s4 type
do
search=`echo $dev|sed "s/\/dev//"`
uuid=`ls -l
--time-style='+' -gG /dev/disk/by-uuid|awk '{ print $4" "$6 }'|sed
"s/..\/..//"|grep -w "$search"|awk '{ print $1 }'`
if [ `mount
|grep "/audio/${uuid}"|awk '{ print $3 }'|grep -c $uuid` -eq 0 ]
then
mkdir -p /audio/${uuid}
echo
`date` >> /tmp/log
echo "mount UUID=$uuid on /audio/${uuid} now device is
${dev}" >> /tmp/log
#mount -t ntfs-3g UUID=$uuid
/audio/${uuid} 1>> /tmp/log 2>&1
mount -t ntfs
UUID=$uuid /audio/${uuid} 1>> /tmp/log 2>&1
fi
done
mount |grep
"/audio/"|awk '{ print $1" "$3 }'|while read dev fs
do
if [ `fdisk -l|grep NTFS|awk '{ print
$1 }' |grep -c $dev` -eq 0 ]
then
echo `date` >> /tmp/log
echo "umount $dev on $fs
because no more available" >> /tmp/log
umount -f $fs 1>> /tmp/log 2>&1
fi
done
#
check if hqplayerd running and if Amanero USB interface is connected
if [ `ps -ef |grep
hqplayerd|grep -v grep|wc -l` -eq 0 ] && [ `cat
/sys/kernel/debug/usb/devices|grep -c Combo384` -eq 1 ]
then
nohup /usr/bin/hqplayerd 1>> /tmp/log 2>&1 &
fi
sleep 10
done
exit 0
Create the file /home/ciuffoly/stop_hqplayer.bash
#!/bin/bash
pkill hqplayerd
mount |grep "/audio"|awk '{
print $3 }'|while read dir
do
echo
`date` >> /tmp/log
echo
"umount $dir" >> /tmp/log
umount -f $dir 1>> /tmp/log 2>&1
done
exit 0
Add execution permission for these scrpts
chmod a+x
/home/ciuffoly/start_hqplayer.bash
chmod a+x /home/ciuffoly/stop_hqplayer.bash
Create
the new service file
[Unit]Description=HQPLAYERAfter=network.targetStartLimitIntervalSec=0[Service]Type=simpleStartLimitIntervalSec=0User=root
Nice=-10
IOSchedulingClass=realtime
LimitMEMLOCK=1G
LimitNICE=-10
LimitRTPRIO=98ExecStart=/home/ciuffoly/start_hqplayer.bashExecStop=/home/ciuffoly/stop_hqplayer.bash[Install]WantedBy=multi-user.target
To restart service daemon with the new service
HQPlayer
The NTFS filesystem will be mounted in read only but if you add another module is possible to mount also for write.
apt-get -y install ntfs-3g
I am using a laptop as HQPlayer computer so it is necessary use this following setting editing the file
/etc/systemd/logind.confHandleLidSwitch=ignore
HandleLidSwitchDocked=ignore
service systemd-logind restart
and enable on bios Restore AC power loss.
Always with a laptop could be useful check battery status with
apt-get install upower

upower -i /org/freedesktop/UPower/devices/battery_BAT0|grep -E "state|to\ full|percentage"
state: charging
time to full: 1.6 hours
percentage: 11%
If you want to use superuser command with the normal user
apt-get install sudo
apt-get install --fix-missing sudo

and edit the file /etc/sudoers to add line like these
ciuffoly ALL=(ALL) NOPASSWD:ALL
If you want to download packages in a private network with a proxy
http_proxy=http://utente:password@proxy:port
export http_proxy
apt-get install --fix-missing sudo
THE HQPLAYERD CONFIGURATION
To configure the HQPlayerd open the website http://192.168.1.2:8088

I suggest to set the Output mode to SDM to convert outptu in DSD, the
modulator to ASDM7 or ADSM5 (if no cpu resource available with 7) and Bitrate at
11289600 Hz or 12288000Hz for a DSD256 setup.
After this first configuration
enter in LIbrary webpage and insert the directory of files to populate the list
of tracks to play (in my case is /audio because all my usb disks are mounted on
this path) to populate the list of tracks to play.

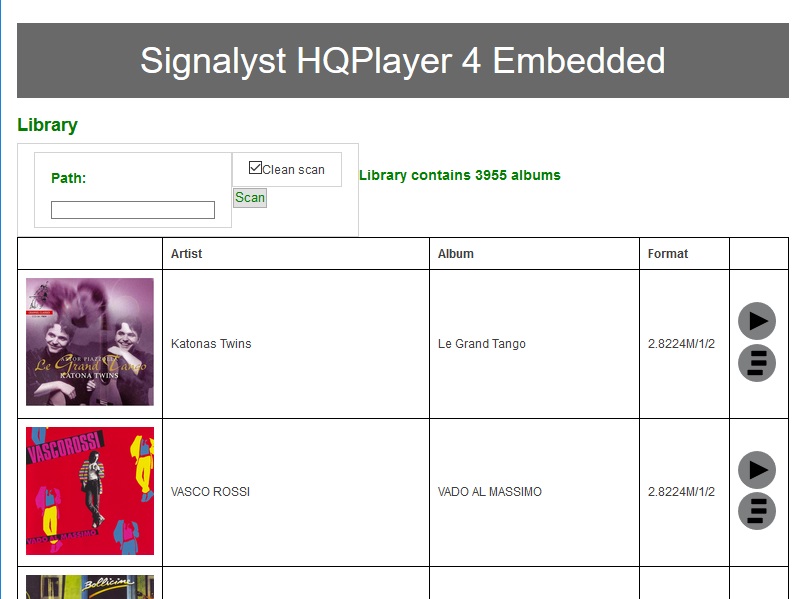
MUSIC
The HQPlayer embeddedd support various source
formats like the FLAC, DSF and DFF but the DFF
compressed are skipped during the Library scan.
Check the DFF tracks skipped
looking the HQPlayer log file with:
root@HQPLayer:~# grep compr /tmp/hqplayerd.log
# 2018/11/26 08:16:55
clReadDSD::Open(/mnt/hgfs/Audio_SACD_to_conv/(Astor Piazzolla) Katona Twins - Le
Grand Tango (2
004)
[SACD-ISO]/01 - Katonas Twins - Fugata.dff): compressed file
# 2018/11/26 08:16:55
clReadDSD::Open(/mnt/hgfs/Audio_SACD_to_conv/(Astor Piazzolla) Katona Twins - Le
Grand Tango (2
004)
[SACD-ISO]/02 - Katonas Twins - Otono Porteno.dff): compressed file
...
Using the following comand you can create a list of DFF compressed and
after you can isolate these in a separated directory.
cat /tmp/hqplayerd.log |grep compre|sed "s/.*Open(//"|sed "s/): compressed file//" > lista
If you are using NTFS filesystem mount this with ntfs-3g (see above) to enable rw mode.
In
my case the audio tracks are in /audio/0CF4AB21F4AB0C50/Audio_SACD so I have created a new directory.mkdir /audio/0CF4AB21F4AB0C50/Audio_SACD_to_conv
Now we have the comand to
move the selected Albun in the new directory.
cat lista |awk -F'/' '{ print "mv
\""$1"/"$2"/"$3"/"$4"/"$5"\" "$1"/"$2"/"$3"/Audio_SACD_to_conv/." }'|sh
ex:
mv "/audio/0CF4AB21F4AB0C50/Audio SACD/(Astor Piazzolla) Katona Twins - Le Grand Tango (2004) [SACD-ISO]" /audio/0CF4AB21F4AB0C50/Audio_SACD_to_conv/.
On Windows operating system is possible to convert these DFF compressed tracks to DSF using the software XRECODE3 (few money to have the licence without limits).
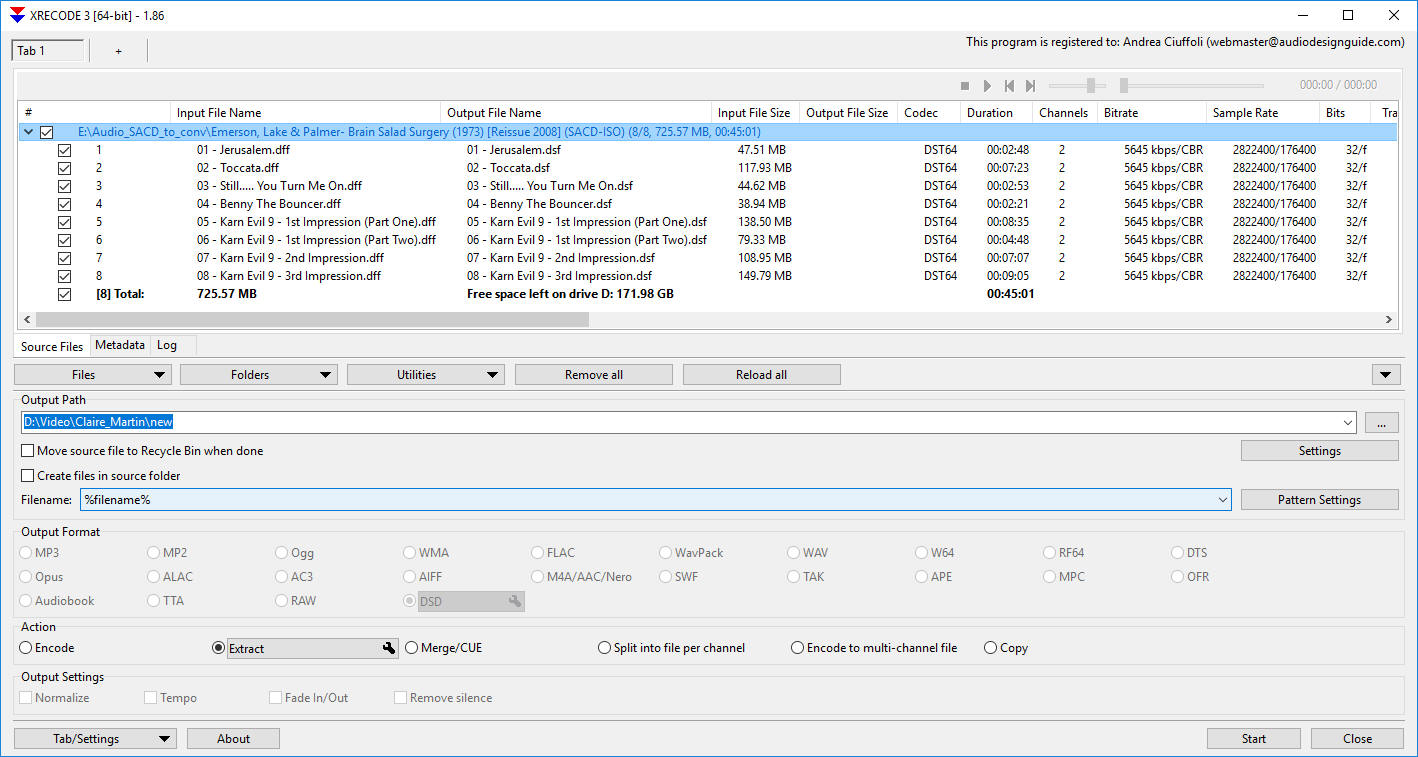
if you have many tracks to convert, like in my case, the XRECODE3 command line version could be used with this method.
xrecode3cx64.exe -i "D:\Audio_SACD_to_conv\Claire_Martin\01 - Claire Martin - Secret Love.dff" /sacdas dsf /dest extract -o "D:\
AudioAudio_SACD_to_conv\Claire_Martin"
#+-------------------------------------------------------------------+
Write-Output "Started dff to dsf convertion"
$sourceDir="e:\Audio_SACD_to_conv\*";
$include = @("*.dff")
$dff_files = Get-ChildItem $sourceDir -recurse -force -include $include
ForEach($i in $dff_files){
Write-Output $i.FullName
$folder = Split-Path -Path $i.FullName
& .\xrecode3cx64.exe
-i $i.FullName /sacdas dsf /dest extract /recycle -o $folder
}
to start this simple script on Windows command line use:
powershell.exe -ExecutionPolicy Bypass -File conv.ps1
If your audio tracks are in a SACD image (.iso)
it is necessary extract these and convert in DSF, the best solution is use the
following free software by
Sonore
(a Windows interface to the sacd_extract program).

HOT SPOT CONFIGURATION
To select the tracks to play you can use the HQPlayerd web interface (http://192.168.1.2:8088)
or the Android application but in both case you probably need a WiFi connection.
May be useful to use the computer where hqplayer runs like
wifi hotspot in order to avoid crossing the home router or to keep the home wifi
off or if you do not have a home internet connection.
To check if the operating
system has detected a wifi network card use this:
root@hqplayer:~# lspci | grep -i wire
03:00.0 Network controller: Realtek Semiconductor
Co., Ltd. RTL8723BE PCIe Wireless Network Adapter
Now install the packages to configure the wifi interface.
apt-get install -y --fix-missing  hostapd
apt-get install -y --fix-missing  iw
Check if your device will support the Access Point mode
root@hqplayer:~# iw list |grep AP
                 * AP
Create a new directory (mkdir /etc/hostapd) and a new file /etc/hostapd/hostapd.conf with hotspot configuration (use vi or nano)
Here hqplayer is the name of my WiFi and valvole001 the password.
Edit the file /etc/network/interfaces to add the wi-fi interface configurationiface wlo1 inet static address 192.168.42.1 netmask 255.255.255.0 Create the file /lib/systemd/system/hostapd.service[Unit]
Install the new service
Install DHCH package
Edit the file /etc/default/udhcpd and change the line:
DHCPD_ENABLED="no"to
#DHCPD_ENABLED="no"
Edit the file
/etc/udhcpd.conf to change these linesstart
192.168.42.2 #default: 192.168.0.20
end
192.168.42.20 #default: 192.168.0.254
interface wlo1
#default: eth0
remaining
yes
#default: yes
opt
dns 8.8.8.8 4.2.2.2
option
subnet 255.255.255.0
opt
router 192.168.42.1
Create the file
[Unit]
Description=DHCP
After=network.target
StartLimitIntervalSec=0
[Service]
ExecStart=/usr/sbin/udhcpd -f /etc/udhcpd.conf
[Install]
WantedBy=multi-user.target
Install the new service
root@hqplayer:~# systemctl daemon-reload
Enable IP fowarding, this is necessary only to use
internet on your tablet or smartphone using the hqplayerd hotspot.
In order to eliminate a bug which causes many disconnections you can try this method.
mv /dev/random /dev/random.orig
ln /dev/urandom /dev/random
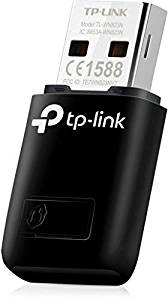
HOT SPOT CONFIGURATION WITH TL-WN823N USB
After some times I got problems with the
internal wifi module so I have decided to use an USB Wi-Fi module.
I have buy
the TP-Link TL-WN823N USB 2.0 Wireless 300Mbps 2.4GHz and these are the
configuration files to use.
Download firmware
https://github.com/wkennington/linux-firmware/blob/master/rtlwifi/rtl8192eu_nic.bin or from here
mkdir -p /lib/firmware/rtlwifi
cp /rtl8192eu_nic.bin /lib/firmware/rtlwifi/.
Download these packages
apt-get -y install dkms
apt-get
-y install git
apt-get -y install
hwinfo
apt-get -y install wireless-tools
apt-get -y install
hostapd
apt-get -y install wireless-tools
apt-get -y install udhcpd
reboot
Plug the TP-Link Wi-Fi USB you will see with dmesg these lines:
[ 1061.895070] usb 2-1: RTL8192EU rev B (SMIC) 2T2R, TX
queues 3, WiFi=1, BT=0, GPS=0, HI PA=0
[ 1061.895071] usb 2-1: RTL8192EU MAC:
50:3e:aa:90:37:d1
[ 1061.895073] usb 2-1: rtl8xxxu: Loading firmware
rtlwifi/rtl8192eu_nic.bin
[ 1061.895096] usb 2-1: firmware: failed to load
rtlwifi/rtl8192eu_nic.bin (-2)
[ 1061.896701] usb 2-1: Direct firmware load
for rtlwifi/rtl8192eu_nic.bin failed with error -2
[ 1061.896707] usb 2-1:
request_firmware(rtlwifi/rtl8192eu_nic.bin) failed
[ 1061.896708] usb 2-1:
Fatal - failed to load firmware
[ 1061.897520] rtl8xxxu: probe of 2-1:1.0
failed with error -11
[ 1061.897549] usbcore: registered new interface driver
rtl8xxxu
Follows these steps
apt-get install linux-headers-`uname -r`
apt-get -y install git dkms
git clone https://github.com/Mange/rtl8192eu-linux-driver.git
cd rtl8192eu-linux-driver/
make
make install
Mirror for this module here: rtl8192eu-linux-driver.tar.gz
reboot
ip addr show|grep mtu
1: lo: <LOOPBACK,UP,LOWER_UP>
mtu 65536 qdisc noqueue state UNKNOWN group default qlen 1
2:
ens33:
<BROADCAST,MULTICAST,UP,LOWER_UP> mtu 1500 qdisc pfifo_fast state UP group
default qlen 1000
3:
wlx503eaa9037d1:
<BROADCAST,MULTICAST,UP,LOWER_UP> mtu 1500 qdisc mq state UP group default qlen
1000
edit the file
/etc/network/interfaces to add these following lines:auto
wlx503eaa9037d1reboot
Create a file with teh name /etc/hostapd/hostapd.conf with these settings:
###############################
# Wireless Settings
###############################
country_code=US
ssid=hqplayer
# g=2.4GHz a=5GHz
hw_mode=g
channel=11
ignore_broadcast_ssid=0
ieee80211n=1
ieee80211ac=0
###############################
# Security Settings
###############################
wpa_passphrase=valvole001
wpa=1
wpa_key_mgmt=WPA-PSK
wpa_pairwise=TKIP
rsn_pairwise=CCMP
###############################
# Interface & Driver Settings
###############################
interface=wlx503eaa9037d1
###############################
# Advanced Settings
###############################
wme_enabled=1
wmm_enabled=1
macaddr_acl=0
auth_algs=1
Edit the file
/etc/default/udhcpd and change the line: DHCPD_ENABLED="no"to
#DHCPD_ENABLED="no"
Edit the file
/etc/udhcpd.conf to change these linesstart
192.168.42.2 #default: 192.168.0.20
end
192.168.42.20 #default: 192.168.0.254
interface
wlx503eaa9037d1 #default: eth0
remaining
yes
#default: yes
opt
dns 8.8.8.8 4.2.2.2
option
subnet 255.255.255.0
opt
router 192.168.42.1
Create the file /lib/systemd/system/udhcpd.service
[Unit]
Description=DHCP
After=network.target
StartLimitIntervalSec=0
[Service]
ExecStart=/usr/sbin/udhcpd -f /etc/udhcpd.conf
[Install]
WantedBy=multi-user.target
Install the new service
systemctl daemon-reload
systemctl
start udhcpd.service
systemctl enable udhcpd.service
Install a new package
apt-get install dnsmasq
append these line to the file
/etc/dnsmasq.conf
# disables dnsmasq reading any other files like
/etc/resolv.conf for nameservers
no-resolv
# Interface to bind to
interface=wlx503eaab92fd5
# Specify starting_range,end_range,lease_time
dhcp-range=192.168.42.2,192.168.42.20,12h
# dns addresses to send to the clients
server=8.8.8.8
server=8.8.4.4
Enable this server
systemctl daemon-reload
systemctl
start dnsmasq.service
systemctl enable
dnsmasq.service
Create the file /lib/systemd/system/hostapd.service
[Unit]
Description=Hostapd
After=network.target StartLimitIntervalSec=0
[Service]
ExecStart=/usr/sbin/hostapd /etc/hostapd/hostapd.conf
-f /tmp/hostapd.log
[Install]
WantedBy=multi-user.target
Install the new service
systemctl daemon-reload
systemctl start hostapd.service
systemctl enable hostapd.service
Enable IP fowarding, this is necessary only to use
internet on your tablet or smartphone using the hqplayerd hotspot.
sh -c "echo 1 > /proc/sys/net/ipv4/ip_forward"
Edit the file
/etc/sysctl.conf
# Uncomment the next line to enable packet forwarding
for IPv4
net.ipv4.ip_forward=1
Start these commands
iptables -t nat -A
POSTROUTING -o ens33 -j MASQUERADE
iptables -A FORWARD -i
ens33 -o
wlx503eaa9037d1 -m
state --state RELATED,ESTABLISHED -j ACCEPT
iptables -A FORWARD -i
wlx503eaa9037d1
-o ens33 -j
ACCEPT
or
iptables -t nat -A
POSTROUTING -o ens33 -j MASQUERADE
iptables -A FORWARD -i
ens33 -o
wlx503eaab92fd5 -m state
--state RELATED,ESTABLISHED -j ACCEPT
iptables -A FORWARD -i
wlx503eaab92fd5
-o ens33 -j
ACCEPT
sh -c "iptables-save > /etc/iptables.ipv4.nat"
Insert this comand after boot, I have update
the script
/home/ciuffoly/start_hqplayer.bash
after the start of hqplayerd
/sbin/iptables-restore <
/etc/iptables.ipv4.nat
more info
iwconfig
lo no wireless extensions.
wlx503eaa9037d1 IEEE 802.11 ESSID:off/any
Mode:Managed Access Point: Not-Associated Tx-Power=0 dBm
Retry short limit:7
RTS thr=2347 B Fragment thr:off
Encryption key:off
Power Management:on
hwinfo |grep 2357
modalias =
"usb:v2357p0109d0200dc00dsc00dp00icFFiscFFipFFin00"
INPUT CONFIGURATION
The Hqplayerd can switch from local Playlist to other input device to ue it with different sources like CD Player or audio streamer service like Spotify.
It is not possible use the HQplayerd with spdif input to listen a film because there is a long delay on audio output.
There are many devices with digital input but the cheaper are the little box based on the CM2606 chip like this following.
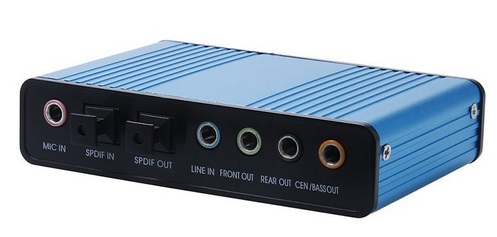
The main problem of this device is the frequency limited to 48KHz but for CD Player and Spotify is good.
You can find on Amazon or Alixpress for 15-20$.
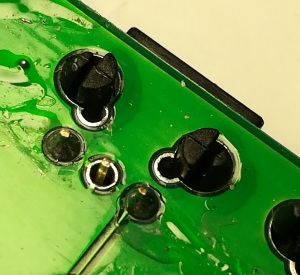
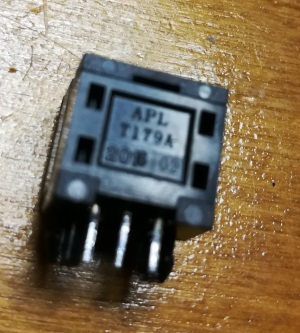
The my device is arrived with this "little" problem, spdif was not soldered and the optical receiver is a transmitter.
I have replaced the component with a valid optical receiver.
It is necessary add this package to manage the spdif input.
apt-get install alsa-utils
To set the input to spdif use:
root@hqplayer:~# amixer -c Device set 'PCM Capture Source' 'Line'
Simple
mixer control 'PCM Capture Source',0
Capabilities: enum
Items: 'Mic'
'Line' 'IEC958 In' 'Mixer'
Item0: 'Line'
Add this line in the file /etc/hqplayer/hqplayerd.xml.
<input channels="2" device="hw:CARD=Device,DEV=0" name="USB Sound Device, USB Audio" period_time="100" samplerate="48000"/>
restart the daemon hqplayerd.
USBStreamer B USB
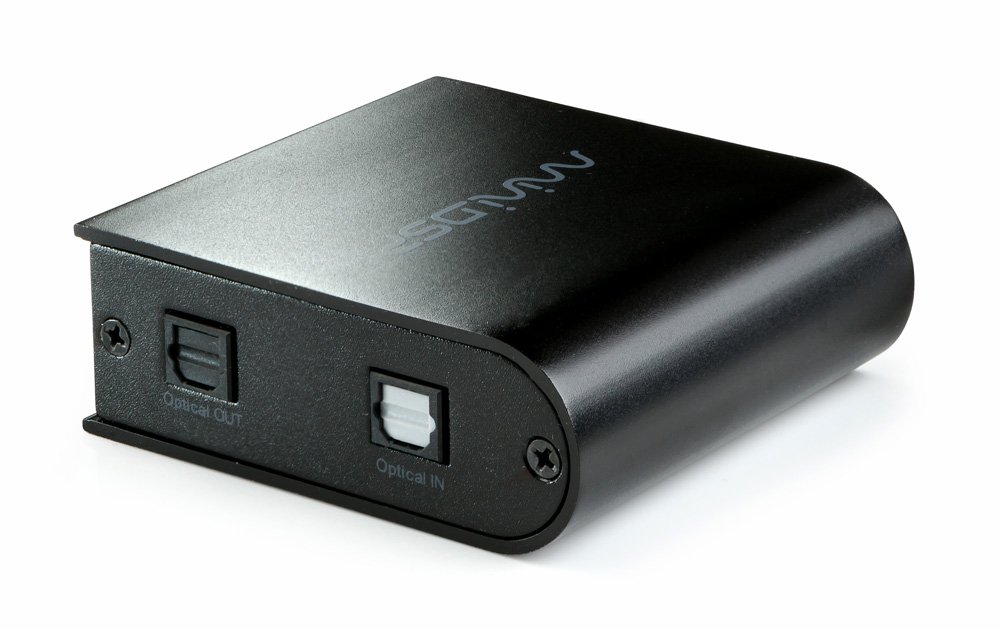
Operates as USB to Toslink (Stereo up to 192k) or
USB to ADAT(up to 8channels at 48/44.1kHz)
No addictional configuration is necessary to use this device.
NAA CONFIGURATION
See in the new project about NAA DAC.
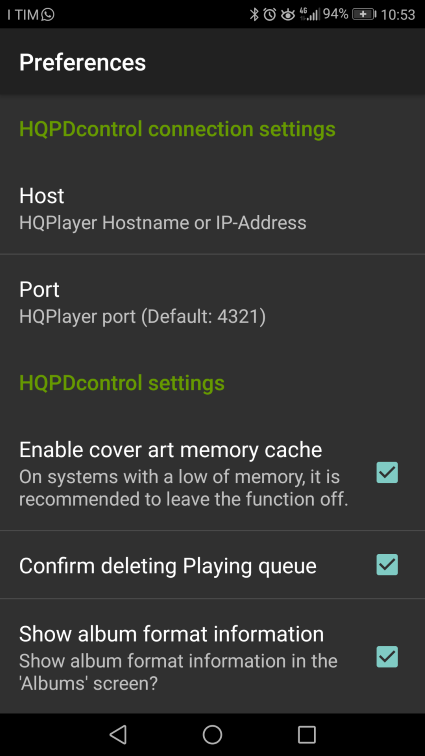
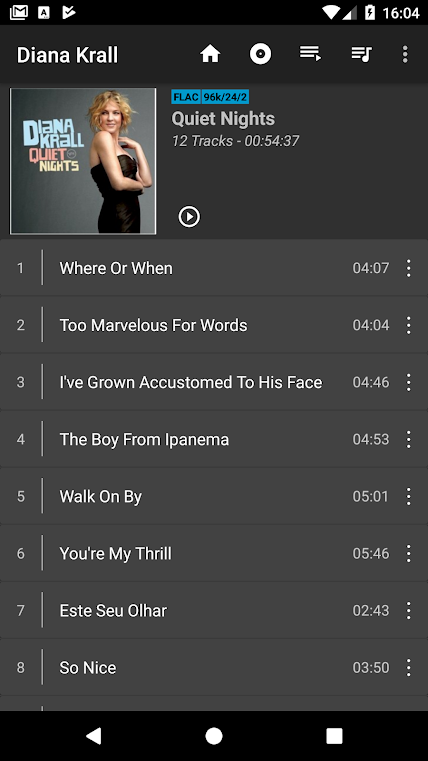
THE REMOTE CONTROL

The
HQPDcontrol is an Android application available on the Playstore.
It
allows remote control of HQPlayer Desktop/Embedded software.
Configure the ip